I need to be honest: when I first started testing Kling 3.0 Motion Control, I thought “motion transfer” would magically fix everything.
It did not.
My first few generations looked exciting for one second, then fell apart. Camera drift. Character wobble. Weird timing jumps. The output looked like a promising draft, not a shippable clip.
Then I changed one thing: I stopped treating motion as a visual effect and started treating it like a system.
This guide is exactly that system. If you follow it step by step, you will produce more stable, more predictable, and more usable AI video output with Kling 3.0 Motion Control.
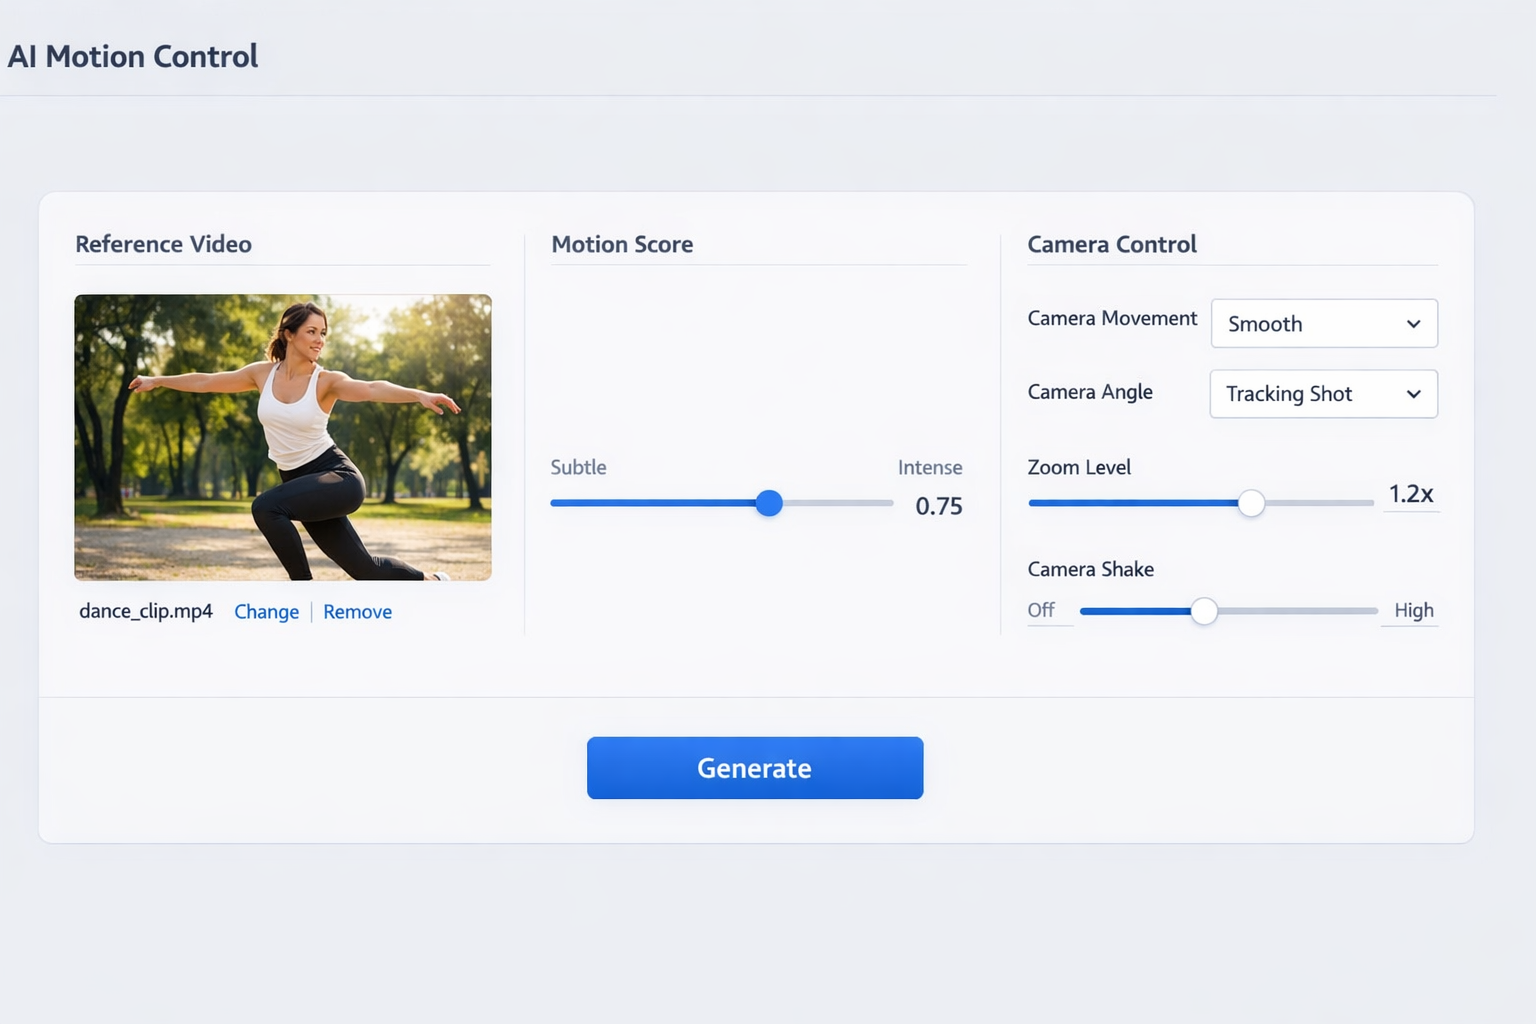
What Kling 3.0 Motion Control Actually Does
Kling 3.0 Motion Control extracts movement patterns from a reference clip and applies that pattern to a newly generated scene.
In plain words:
- Your prompt controls what the scene is.
- Your reference controls how the scene moves.
That split is powerful. It means you can keep a strong motion blueprint while changing identity, wardrobe, setting, lighting, and art style.
My 3-Layer Workflow (The One That Finally Worked)
I now run every project through three layers in this order:
- Reference quality
- Motion settings
- Prompt precision
Most people do layer 3 first, which is why they burn credits and still get unstable motion.
Layer 1: Reference Quality (Most Important)
A clean reference gives Kling clean motion data.
A messy reference gives Kling messy motion data.
Before uploading, I check four things:
- Is the subject clearly visible?
- Is the movement direction readable?
- Is the camera behavior consistent?
- Are there abrupt cuts inside the clip?
If the answer to any is “no,” I swap the reference before doing anything else.
Layer 2: Motion Settings
The most important control is motion_score.
I use a simple ladder:
- Low
- Medium
- Medium-high
I keep everything else fixed and compare output stability.
This gives me a safe range for that exact prompt + reference pair.
Layer 3: Prompt Precision
Your prompt still matters a lot. I structure mine like this:
- Subject identity
- Scene context
- Camera intent
- Quality constraints
Example skeleton:
A female street dancer in a futuristic neon alley at night, cinematic lighting, tracking shot with smooth forward movement, high temporal consistency, avoid jitter and body deformation.
That one line often outperforms long, messy prompts.
Step-by-Step: How I Generate Stable Results
Step 1: Pick the Right Reference First
If your reference clip is unstable, your output will usually inherit instability.
I prefer references that are:
- 1 clear subject
- Predictable pace
- Moderate movement (for baseline tests)
- Minimal camera chaos
This is boring advice, but it saves hours.
Step 2: Set a Baseline Before Going “Cinematic”
I never start at high motion.
I run a calm baseline first. Why?
Because baseline output tells me whether identity, anatomy, and framing are already healthy.
If baseline is broken, high motion will amplify failure.
Step 3: Tune motion_score in Controlled Deltas
I change only one variable per run.
- Run A: low
- Run B: medium
- Run C: medium-high
Then I review:
- Subject integrity
- Motion continuity
- Camera path smoothness
I pick the highest score that still preserves integrity.
Step 4: Lock Camera Language in Prompt
Many creators forget this.
Even with Motion Control, camera intent should be explicit:
slow push-intracking shotlocked framegentle pan right
Without camera language, the model sometimes “helpfully improvises.”
Step 5: Add Negative Constraints
I add short guardrails, not long paragraphs:
- avoid jitter
- avoid warped limbs
- avoid sudden zoom jumps
- avoid frame flicker
These constraints reduce failure rate at medium and high motion settings.
Step 6: Compare Variants Side by Side
Do not trust your memory.
I keep variants in a simple sheet with:
- reference id
- prompt version
- motion_score
- camera settings
- pass/fail notes
This turns random experimentation into a repeatable workflow.
The 7 Most Common Problems (and How I Fix Them)
1) Motion Looks Too Chaotic
Cause: score too high, or noisy reference
Fix: lower score first, then replace reference if needed
2) Subject Identity Drifts
Cause: weak identity prompt
Fix: strengthen subject attributes before style details
3) Camera Feels Random
Cause: missing camera intent
Fix: add direct camera language in prompt
4) Anatomy Breaks During Fast Moves
Cause: high motion + low structure constraints
Fix: reduce score and add integrity constraints
5) Output Looks Slow and Flat
Cause: score too conservative for target style
Fix: increase score one step and re-test
6) Great First 2 Seconds, Bad Last 2 Seconds
Cause: reference pacing mismatch
Fix: choose references with consistent pacing across full duration
7) Inconsistent Results Across Team Members
Cause: no shared template
Fix: build reusable presets with documented ranges
My Prompt Template for Kling 3.0 Motion Control
Use this template as your starting point:
[Subject + identity details], [environment + lighting], [camera intent], [movement style], [quality constraints], [negative constraints].
Example:
A confident female dancer in black sportswear, wet neon street at night, smooth tracking shot from front-left angle, dynamic but controlled footwork rhythm, high temporal coherence and stable body proportions, avoid jitter, avoid anatomy distortion, avoid abrupt zoom.
Practical Use Cases (Where This Pays Off Fast)
UGC and Performance Ads
You can transfer believable body movement into branded scenes while keeping camera rhythm clean enough for paid social.
Music Visual Loops
Motion transfer helps maintain beat-aligned movement patterns in short loops.
Product Reveal Shorts
Controlled camera movement is often more important than flashy style for conversion-oriented creatives.
Creator Content at Scale
Template-based motion settings let teams produce consistent series output.
My Quality Checklist Before Export
I never ship a clip unless it passes all 3:
- Motion continuity is stable
- Subject integrity is preserved
- Camera intent matches the storyboard
If any one fails, I iterate.
This checklist alone improved my usable-output rate dramatically.
How This Connects to Pricing and Stack Decisions
If you are comparing plans, do not look only at monthly price.
Look at cost per usable clip.
A “cheap” plan that requires many retries can be more expensive than a higher tier with stable output.
I break this down in Kling 3.0 Pricing: Free vs Pro vs API.
If you are choosing between platforms, read Kling 3.0 vs Omni vs Higgsfield.
For implementation details, see Kling 3.0 Documentation API Guide.
The Bottom Line
Kling 3.0 Motion Control is not a “one-click perfect video” button.
It is better than that.
It is a controllable system. And once you treat it like a system, quality becomes repeatable.
If you want stable output:
- Start with clean references.
- Tune motion_score in controlled steps.
- Write camera intent explicitly.
- Lock winning settings into reusable templates.
When you do that consistently, Kling 3.0 Motion Control stops feeling like experimentation and starts feeling like production.
Ready to test this workflow yourself? Open the Kling 3.0 Motion Control tool and run your first three-score ladder today.